Started Using oh-my-zsh
Setting up oh-my-zsh and problems with default Terminal app
I have started using oh-my-zsh finally. I was using it sometime back on iTerm2 but after an issue on iTerm2, I had stopped using this. But since this issue was fixed, I wanted to give it a try.
There are UX problems with default terminal app we get with MacOS. To count few of them these are-
- No autocomplete when you hit tab
- Poor syntax highlighting and design
- Problems when using
tmux
Of course to fix some of these problem you can create .inputrc file by adding following content to it1-
"\e[1~": beginning-of-line
"\e[4~": end-of-line
"\e[5~": history-search-backward
"\e[6~": history-search-forward
"\e[3~": delete-char
"\e[2~": quoted-insert
"\e[5C": forward-word
"\e[5D": backward-word
"\e\e[C": forward-word
"\e\e[D": backward-word

set completion-ignore-case On
set expand-tilde on
set convert-meta off
set input-meta on
set output-meta on
set show-all-if-ambiguous on
set visible-stats on
set -o vi
But to improve the terminal it can enable all these by default. Anyway, even though you enable all these the autocomplete is not as smart as it is in zsh. To see all the features you can see on their features page2.
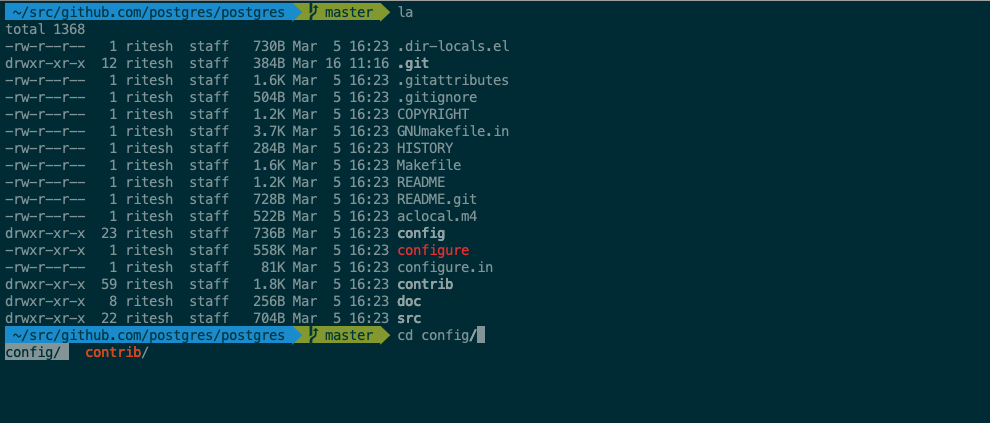
In this post we’ll discuss, how to setup oh-my-zsh on MacOS and once setup is finished the terminal will look something like below.
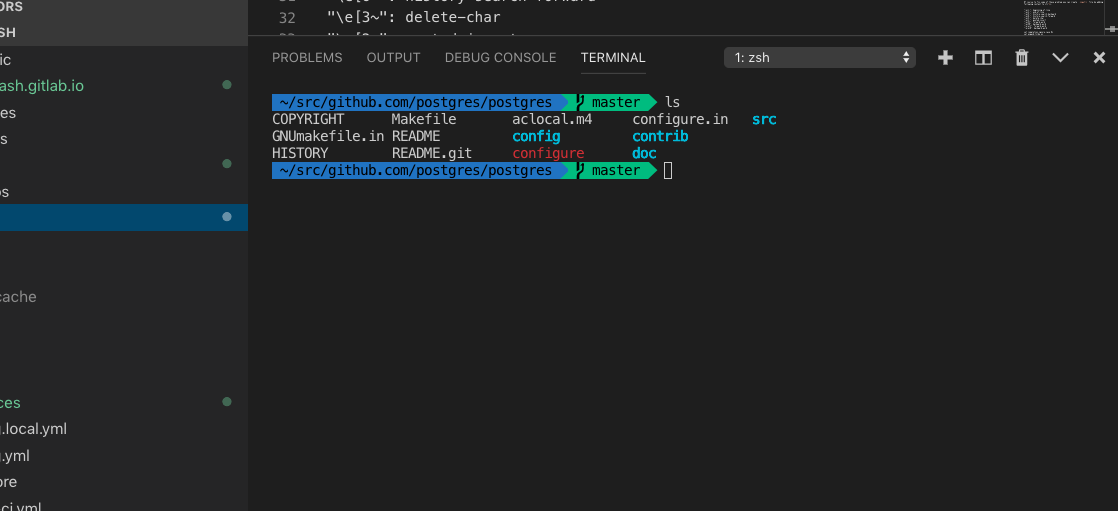
Additionally if you use Visual Studio Code, the terminal inside it will appear like something below.
Now let’s dive into how to do this setup!
Setting up iTerm2
The first step is to install iTerm2. Download the archive and extract the app and move it to Applications directory. Once iTerm2 is install do following-
- Change iTerm 2 color scheme to “Solarized Dark” from
Preferences -> Profiles -> Colors -> Color Preset
Setting up Oh-my-zsh
You can use curl to install oh-my-zsh. To do so, simply run:
sh -c "$(curl -fsSL https://raw.githubusercontent.com/robbyrussell/oh-my-zsh/master/tools/install.sh)"
And in file ~/.zshrc, find ZSH_THEME and update value to "agnoster", after this the line will look like following:
# Set name of the theme to load --- if set to "random", it will
# load a random theme each time oh-my-zsh is loaded, in which case,
# to know which specific one was loaded, run: echo $RANDOM_THEME
# See https://github.com/robbyrussell/oh-my-zsh/wiki/Themes
ZSH_THEME="agnoster"
Fixing font issue
When you do all these, and when you restart iTerm2 you will notice some issue in the prompt that the icons are not properly being shown. To fix this you need to download Menlo-for-Powerline. I use Menlo for Powerline.ttf, you can download font and when you open it, this will show a button to install the font. After installing the font follow these steps-
- Open iTerm2 and go to
Preferences -> Profiles -> Text -> Change Font - Select
Menlo for Powerlinefrom the Family dropdown - Restart iTerm2
Visual Studio Code setup
To use zsh in your Visual Studio Code, you can follow these steps.
- Open
settings.jsonby pressingCmd+Shift+pand search forOpen Setting (JSON) - Update setting to look like following
{ "window.zoomLevel": 1, "terminal.integrated.rendererType": "dom", "editor.tabSize": 2, "editor.renderWhitespace": "boundary", "terminal.integrated.shell.osx": "/bin/zsh", "terminal.integrated.fontFamily": "Menlo for Powerline" } - Restart Visual Studio Code
That is all for this post. If you have any settings recommendations that I should try out let me know! Thank you for reading. Happy coding!
-
iTerm2 Features https://iterm2.com/features.html ↩